Hello everybody, it is me again, Dan, welcome to our recipe site. Today, I’m gonna show you how to prepare a special dish, classic red velvet cake with whipped cream frosting. It is one of my favorites. This time, I will make it a bit tasty. This is gonna smell and look delicious.
In this video I share with you my Red Velvet Cake Recipe. It's a wonderful tender cake, perfect for any special occasion. Want to see more stunning cake. This recipe produces the best red velvet cake with superior buttery, vanilla, and cocoa flavors, as well as a delicious tang from buttermilk.
Classic Red Velvet cake with whipped cream frosting is one of the most favored of recent trending foods on earth. It’s easy, it’s quick, it tastes yummy. It is enjoyed by millions daily. Classic Red Velvet cake with whipped cream frosting is something that I’ve loved my whole life. They are fine and they look wonderful.
To get started with this recipe, we must prepare a few ingredients. You can have classic red velvet cake with whipped cream frosting using 14 ingredients and 11 steps. Here is how you can achieve that.
The ingredients needed to make Classic Red Velvet cake with whipped cream frosting:
- Prepare 397 gram all-purpose flour
- Make ready 397 gram granulated sugar
- Get 2 tbsp cocoa powder
- Take 1 tsp baking soda
- Make ready 2 large eggs at room temperature
- Make ready 114 gram cooking oil
- Get 227 gram buttermilk (150ml curd+77ml water)at room temperature
- Get 1 tbsp white vinegar
- Take 170 gram salted butter (add 1 tsp salt if the butter is unsalted)
- Prepare 1 tsp vanilla essence
- Make ready 1 tbsp super red food colour (some people use beat root pulp)
- Make ready For frosting
- Make ready 500 ml whipping cream
- Take 1/2 cup Chocolate chips
Red velvet cake is a classic American dessert, but it's becoming more and more popular outside of the US, and for a good reason - it's so festive and Also how long can I keep cream cheese frosting out. Its for a red velvet cake with cream cheese frosting covered with fondant. I am worried if I keep it in. The only Red Velvet Cake recipe you'll ever need!
Instructions to make Classic Red Velvet cake with whipped cream frosting:
- Melt butter. Ensure that the butter is melted, but not hot when using it. Sift four, cocoa powder and baking Powder together. Add sugar and combine. Shift it to a cake mixing bowl. Keep aside.
- Combine butter, eggs, oil, vinegar, buttermilk, vanilla and food colour. Whisk lightly till it all gets well combined.
- Add the wet mixure to the dry mixure. Run a whisk in it till everything is combined Well and the batter looks smooth and fluffy. Apply oil in the cake tin. Pour the batter in it till half or 3/4 the most. Bake in the oven preheated at 180c. for 35-40 min.
- Check if the cake is ready by piercing a knife or a toothpick right through at the middle. It would come out clean. The sides also saperate from the tin when ready. Let the tin rest aside for about 20 min. Then run a knife around the edges of the cake to separate it from the tin incase it's stick somewhere. place it upside down on a rake. You may place a wet cloth on the top of it to cool the cake faster. The cake will drop down on the rake.
- Let the cake cool down completely before icing. I prefer to ice the cake on the next day. Chill the bowl and the cream in freezer for about 1-2 hours (not more). Whip the cream in the chilled bowl starting with slow speed and gradually increasing it. Always use an electric machine as it takes about 15 min to whip it.
- Whip till you reach stiff pick or till the cream is stiff enough not to fall out of bowl when you turn it upside down.
- Place the cake on a levelled surface and gently cut out the doom and make it levelled at the top. Keep the crumbs aside for decoration. Then cut in the middle horizontally so as to get two circles. Place a piece on the cake board. Cover it all around with icing. Sprinkle some choco chips. Place another piece on the top and cover up the entire cake with icing. Smoothen the icing.
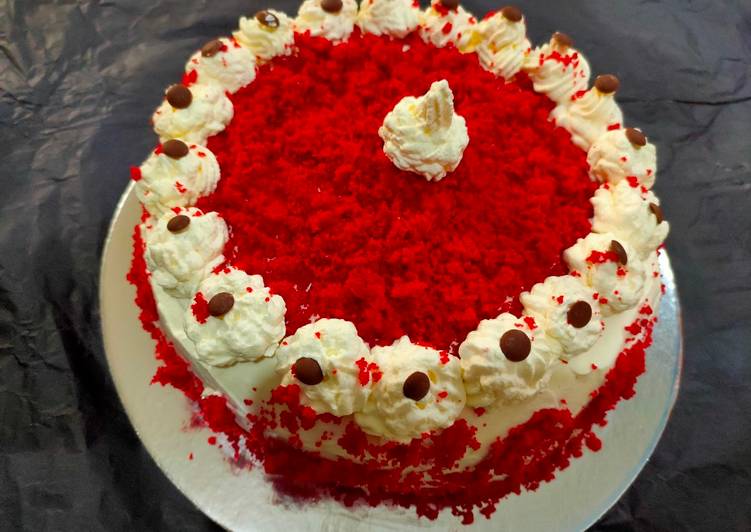
- Put the cake crumbs in the middle of the cake. Fill in the piping in the icing bag and fix a big star nozzle. Make a pattern around the edge of the cake using a piping bag. Put a choco chip on each pattern. Stick some crumbs on the sides of the cake. And our cake is ready ! 😍
- Tips : 1. You may bake two pieces of cake if you do not wish to cut the cake in the middle for icing. 2. Ensure that you use the right size of the cake tin. If the cake tin is too dip so as to fill in the batter till 1/4 only, the cake is likely to break while taking it out of the tin. I made that mistake and my cakes broke ! 3. Chill the cream and the bowl before whipping, but do not chill till the cream is frozen or else it will be of no use for icing even if you bring it's temperature down.
-
- Chocolate chips gives an extra punch to the cake. Do not skip it. 5. It's important to whip the cream till stiff pick to keep the icing intact. Otherwise the icing will keep melting. Piping will also not be easy with softer cream as it will not hold it's shape. 6. Refrigerate the cake once iced.
- You may also make cupcakes using the same batter. Bake cupcake for 20-25 min. Frost them once they cool down. Sprinkle some cake crumbs for decoration.
I am worried if I keep it in. The only Red Velvet Cake recipe you'll ever need! It's soft, moist, fluffy, rich, strikingly beautiful and decadently delicious. There's nothing quite like a decadent piece of red velvet cake covered in cream cheese frosting is there? I love that it's a unique flavor all it's own. (Video above) I think the cream cheese frosting so many places put on red velvet cake is just WRONG!
So that’s going to wrap it up with this exceptional food classic red velvet cake with whipped cream frosting recipe. Thanks so much for reading. I am sure that you can make this at home. There’s gonna be interesting food in home recipes coming up. Don’t forget to save this page in your browser, and share it to your loved ones, friends and colleague. Thanks again for reading. Go on get cooking!